 Good things take time – right? Hopefully the same remains true for this post as well. As you’ll soon see, my last project involved lots of waiting. And waiting. But just like a fine wine, a good steak only gets better with age. Every steakhouse worth its salt is going to serve prime, aged (hopefully dry vs. wet, but I’ll get into that) cuts of beef. But, why limit yourself to enjoying good steak only at steakhouses? In the theme of home brewing, if something is worth eating then it’s worth cooking up yourself. The best part is, I’ve done all the waiting for you and condensed everything down into an easy to read blog post (I also ate all of the steak so let’s call it even).
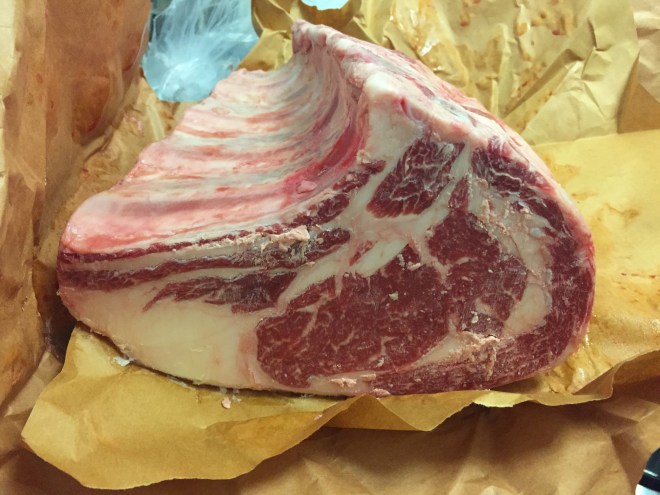
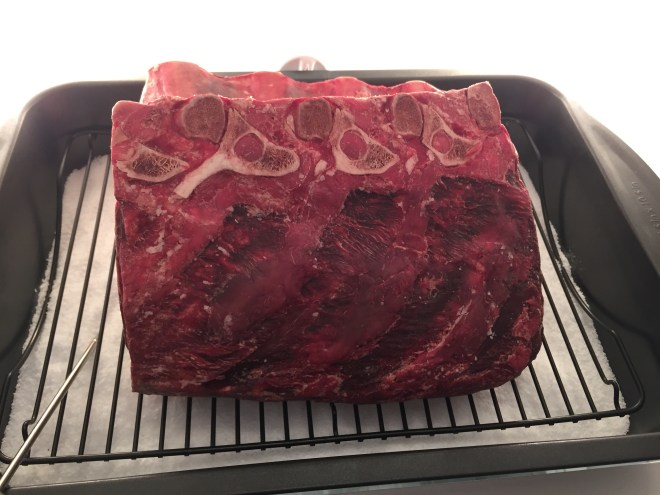
Before I get too far ahead of myself, that hunk of beef up above is a USDA Prime rib roast – about 12 pounds (4 ribs) worth. If you do this yourself, you’ll want to make sure to get a bone-in cut since the bones can help add to the flavor.

If you’ve heard of the term “prime rib”, it refers to the same cut (though the “prime rib” doesn’t necessarily imply or require a USDA Prime grade). The more clever readers out there might have figured out that the rib roast is cut from the cow’s rib section. In fact, its from the same general area as the short rib.
A quick note on the USDA grades: Prime is the highest quality and represents the most thoroughly marbled (the distribution of fat within the muscle). You probably won’t find Prime at your local supermarket as this is usually only found at butcher shops and served at expensive restaurants and steakhouses. Choice is the next step down is what you’ll typically find on supermarket shelves. It’s not quite as well marbled as Prime, but still represents a quality cut. Select is the next grade down from Choice and here is when you start needing to take that into account during preparation as the lack of marbling often means the meat will be a bit drier and tougher without marinating or braising. Beyond choice you also have (in decreasing order of quality): Standard, Commercial, Utility, Cutter, Canner. Standard and Commercial may be found as store brand meat while the three lower grades are rarely seen on store shelves and are more often used for ground beef and other processed meat products.
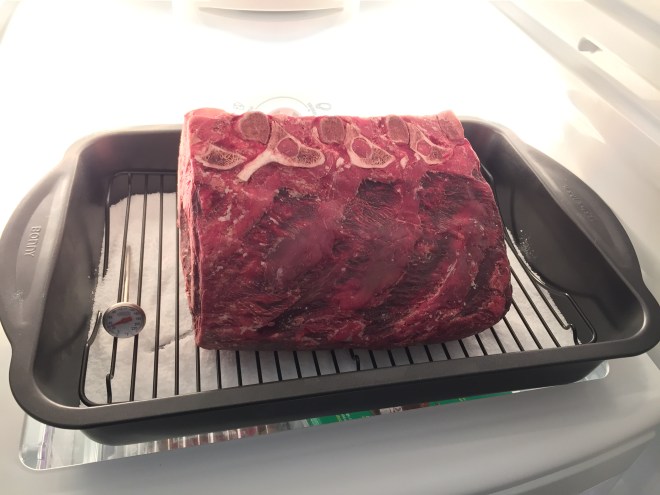
Back to our rib roast. We’ve got 12 pounds of meat – how do we dry age it? The first step is to unwrap it and pat it dry with some clean paper towel. Next, prepare a roasting pan by covering the bottom of it in about a quarter-inch thick layer of kosher salt. After that you’ll want to put a roasting rack inside the pan to raise the meat above the layer of salt and ensure that air is circulating all around the meat. This airflow is key to making sure that the meat doesn’t begin to spoil and rot (hence the “dry” aging). I’ve heard recommendations that include keeping a fan running in the refrigerator to maintain airflow, but I didn’t find that necessary. As long as the meat is raised and you have the salt there to help control moisture you should be fine.
Once you’ve dried the roast and prepared the pan, put the roast on the pan and the pan in the refrigerator, uncovered, and wait….
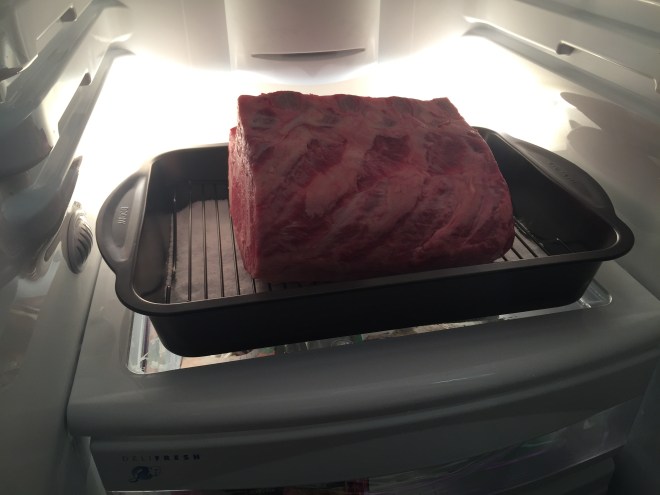
Week 0 (above): The first day of dry aging. Note the white coloring of the fat and light pink hue of the muscle.
Week 1 (above): Notice how the fat has turned almost exclusively red and the muscle has changed from a light pink to a shade of red.
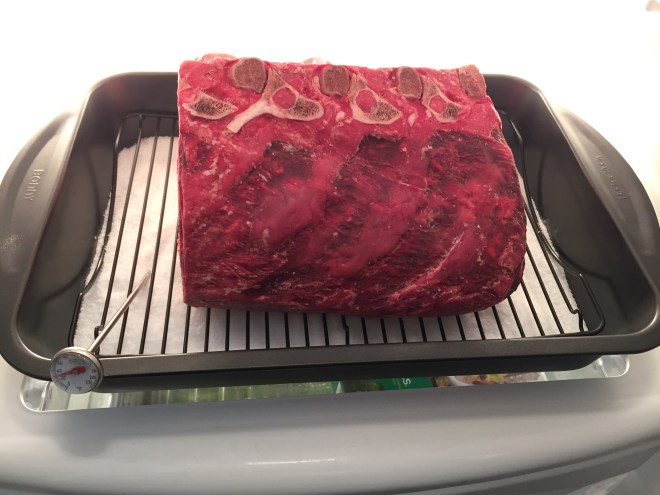
Week 2 (above): As the steak continues to age the muscle fibers continue to turn a darker shade of red. I’m also realizing that now might be a good time to explain why exactly we are dry aging this steak over 4 agonizing weeks instead of just cutting it up into steaks on Day 1. Aging provides a much deeper and more complex flavor by allowing the natural enzymes in the meat to break down the fiber. There are two predominant methods of aging: dry and wet. Wet aging is more common because it is simper and more cost-effective. During wet aging, the steaks are sealed in plastic vacuum pack bags and allowed to age for the desired amount of time. The appeal of wet-aging is that it requires minimal monitoring while the steaks are aging and there is no loss in weight during the process. Dry aging resembles the process I am walking you through here where the meat is left out in the open to age. Dy aging causes the meat to dehydrate which further enhances its flavor and makes its taste (generally) superior to that of wet aged steaks. However, the dehydration that is inherent in dry aging causes the meat to lose weight, which along with the forced removed of the dried exterior mean that there is less meat at the end of dry aging than one started with (hence the higher prices for dry aged steak). Moral of the story: dry aged steak tastes the best and if something is worth doing it’s worth doing right.
Week 3 (above): The red color continues to intensify and you begin to see the exterior of the steak begin to dry out.
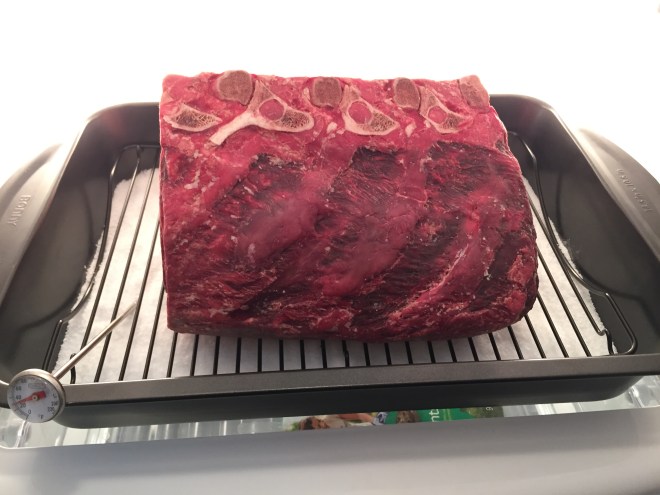
Week 4 (above): The final week of aging – this steak is pretty much ready to go. Why 4 weeks? It was a somewhat arbitrary target, but that is typically the time frame where you will get the best flavor. Less than 4 weeks doesn’t provide as large an improvement in flavor while beyond the 4 week mark the meat begins to take on gamy characteristics.
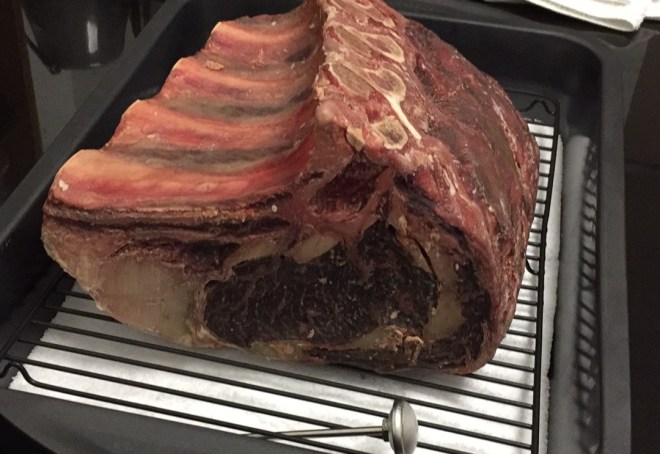
After 4 weeks of waiting, the roast is finally ready to cook (and eat!!). At this point the exterior has become quite dry. Before we can cook this up, we have to remove the dried exterior. A filet knife is recommended for this. Using the knife you want to trim a VERY thin layer off the steak. The goal is to remove only the dry exterior and not the rich, flavorful interior that you spent 4 weeks nurturing.
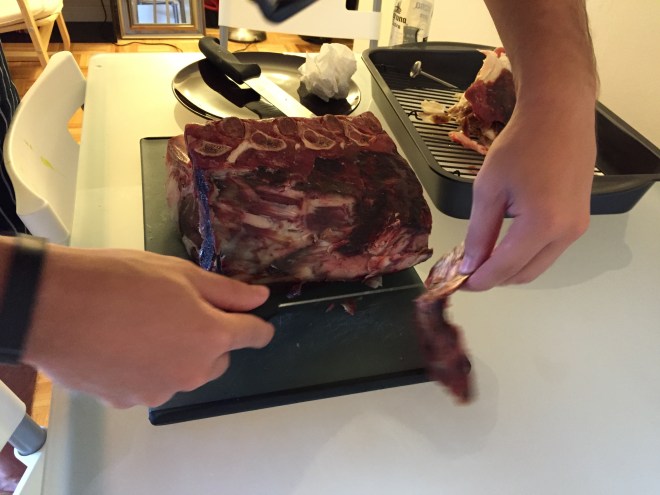
Ok, so we’ve got a rib roast (or prime rib), but we’re talking about steak here! There’s a very difficult step involved to turn that rib roast into a ribeye. You slice it into steaks. Yup, that’s it. When you order a ribeye at a restaurant they’ll chop it off of a larger rib roast. Fancy steakhouses and butcher shops will have electric powered band saws to slice through these steaks, but if your kitchen is anything like mine, you won’t have access to that either. The solution is to stand the roast on it’s bottom and use a large carving knife to slice in between each bone (4 ribs = 4 steaks). You won’t be able to get all the way through because the bones become quite close together at the end. Using the same filet knife, you should be able to finesse your way through. Whatever you do, don’t cut the bones off.
Now that our rib roast has now transformed into 4 ribeye steaks, it’s time to cook. Before cooking, ensure that the steak is at room temperature. You might want to season the steak with a little (I stress: little) olive oil, salt, pepper and rosemary about 30 minutes prior to cooking.
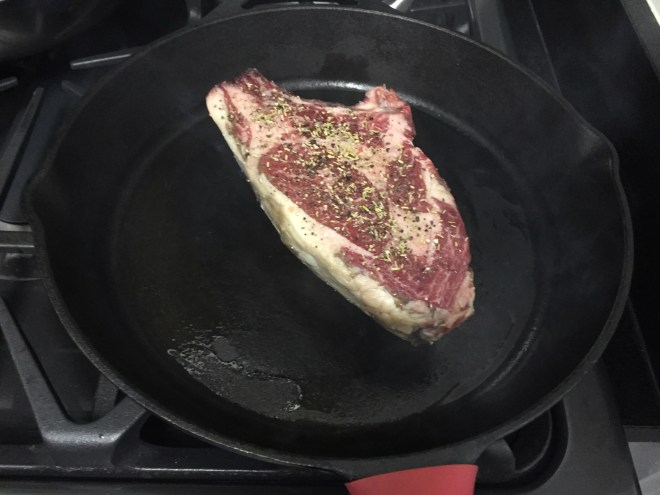
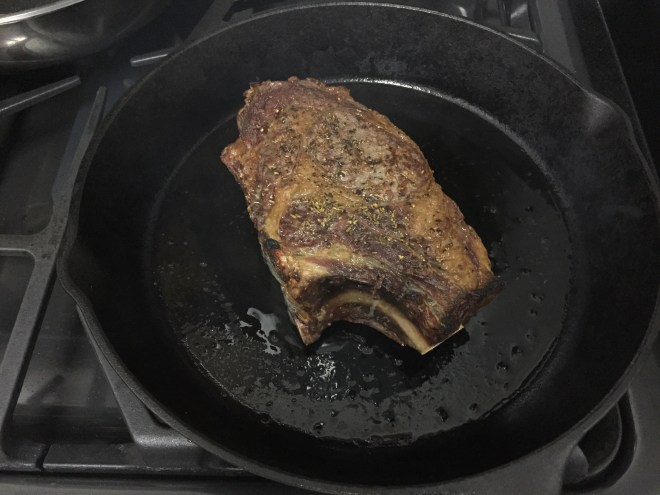
I like cooking in cast iron, especially when it comes to steaks, but any frying pan should work. You’ll want to put the burner on medium-high heat and let the pan heat up. The goal is to sear each side of the steak – about 3 minutes each. The goal isn’t to cook it through, but rather to give it a nice seared crust on either side. Once each side has been seared, you’ll want to transfer to the broiler. Since I used cast iron, I just transferred the entire pan, but if you’re using a standard frying pan you’ll want to transfer to an oven safe rack. These steaks were cut quite thick so I broiled for about 5 minutes on each side to get a nice medium-rare center. If you do undertake the trouble to do this at home, please, please, please do not cook your steak to anything about medium-rare.
If dry aged steak is so good, why doesn’t everyone do it? Well, my first guess is they don’t know how to (so you don’t have that excuse any more). My second would be that people just don’t have the space in their fridge to leave a roast of meat sitting there for over a month (so get a second refrigerator – it’s worth it!). The finished product was well worth the wait. It’s hard to understand how much better a prime, dry aged steak can be – a steak is a steak is a steak after all – but once you try one, you’ll understand. The problem will be going back to eating anything else afterwards.
